ChatGPT is a large language model that was trained by OpenAI, an artificial intelligence research laboratory consisting of the for-profit corporation OpenAI LP and its parent company, the non-profit OpenAI Inc. OpenAI was founded in 2015 with the goal of advancing digital intelligence in a way that benefits humanity as a whole. They focus on developing cutting-edge AI technologies, conducting research, and promoting responsible use and safe deployment of AI. One of OpenAI's most famous achievements is the development of the GPT (Generative Pre-trained Transformer) language model series, of which ChatGPT is a part. ChatGPT is designed to be conversational and able to understand and generate natural language responses to a wide range of topics.
By integrating ChatGPT into your app, you can provide your users with an interactive chatbot that can understand and respond to their questions and requests in a human-like manner.
This tutorial will cover the basics of ChatGPT, including how it works and how to access it using OpenAI's API. It will also cover the steps required to integrate ChatGPT into a Flutter app, including setting up the necessary dependencies, creating a chatbot interface, and handling user input and responses. Overall, this will provide a valuable resource for developers looking to add powerful natural language processing capabilities to their Flutter apps.
Model being used
Text-Davinci-002 is one of the language models developed by OpenAI, and is a variant of the GPT-3 model. It has been trained on an enormous amount of text data, allowing it to generate human-like responses to a wide variety of prompts. Text-Davinci-002 is a larger model than its predecessor, Text-Curie, and is capable of generating more sophisticated and coherent responses. It is currently only available through OpenAI's API, which allows developers to access its capabilities through a simple HTTP request.
Steps to integrate the API
To integrate the ChatGPT API into a Flutter app, follow these steps:
- Get an API key: An API key will be required to access the ChatGPT API. You can sign up for an API key on the ChatGPT website.
- Integrate the backend server with the Flutter app: You can use Flutter's HTTP client to make API requests to the backend server and receive responses.
- Display responses in the chat UI: Once the response is received from the ChatGPT API, we will display it in the chat UI of the Flutter app.
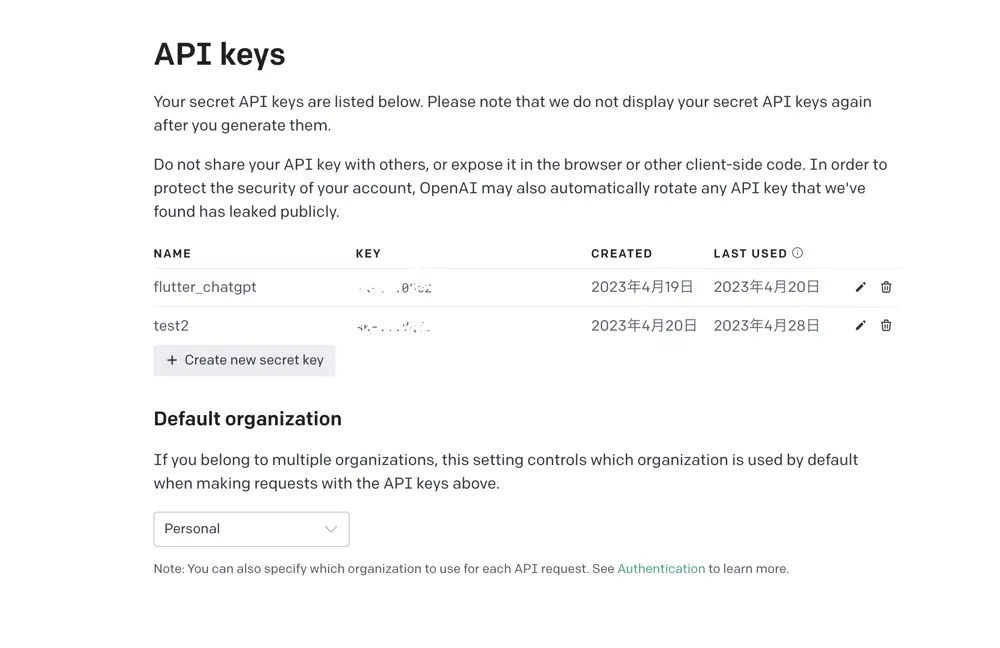
Get the key
Signup to get an API key from the website: Get your API key here
Handling the Request/Response of the model
Let's start with creating a repository to handle the API responses.
Chat Repository
import 'dart:convert';
import 'package:cgp/repository/response.dart';
import 'package:http/http.dart' as http;
class ChatRepository {
  Future<Response?> makeRequest({required String question}) async {
    final url = Uri.parse('https://api.openai.com/v1/completions');
    final headers = {
      'Content-Type': 'application/json',
      'Authorization': 'Bearer API-Token',
    };
    final data = {
      'prompt': question,
      'model': 'text-davinci-002',
      'temperature': 0.5,
      'max_tokens': 50,
    };

    final response = await http.post(
        url, headers: headers, body: jsonEncode(data));
    if (response.statusCode == 200) {
      final jsonData = jsonDecode(response.body);
      final text = jsonData['choices'][0]['text'];
      return Response.success(text);
      // handle the success response
    } else {
      final error = jsonDecode(response.body);
      final errorMessage = error['error']['message'];
      return  Response.error(errorMessage);
      // handle the error response
    }
  }
}
In this code, the OpenAI class is used to handle the Text-Davinci-002 API of OpenAI. The constructor takes two arguments, apiKey and apiUrl, which are used to authenticate the API request and specify the API endpoint, respectively. Replace your API token in the above code.
The getResponse function takes a message argument, which is the text message to send to the API. The function sends a POST request to the API with the message as the prompt and additional parameters such as temperature and max_tokens. The model parameter is set to text-davinci-002 to use the Text-Davinci-002 model.
If the response status code is 200, the function decodes the response body using the jsonDecode function and returns the generated text from the response. If the response status code is not 200, the function throws an exception with the error message.
Response class
This is a freezed class that represents a response from an API with two possible subtypes: SuccessResponse and ErrorResponse. Here's what each part of the code does:
part 'response.freezed.dart';
part 'response.g.dart';
These two lines define the filenames for the generated code. freezed uses the .freezed.dart file to generate the freezed classes, and the .g.dart file to generate serialization/deserialization code.
@freezed
class Response with _$Response {}
This line defines the Response class as a freezed class with the $Response mixin(Success and Error). The mixin provides useful methods like copyWith, toString, and operator ==.
factory Response.success(String text) = SuccessResponse;
factory Response.error(String message) = ErrorResponse;
This factory method deserializes a JSON object into a Response object. It uses the generated _$ResponseFromJson function from the .g.dart file to deserialize the JSON.
To use this Response class, you can create instances of SuccessResponse or ErrorResponse based on the API response, and then use them in your code.
The class will look like the following:
import 'package:freezed_annotation/freezed_annotation.dart';

part 'response.freezed.dart';
part 'response.g.dart';

@freezed
class Response with _$Response {
 factory Response.success(String text) = SuccessResponse;
 factory Response.error(String message) = ErrorResponse;

 factory Response.fromJson(Map<String, dynamic> json) =>
     _$ResponseFromJson(json);
}
Chat Page View Model
To handle the logic between the UI and repository we will create a chat page view model class.
Chat Page State Handling
@freezed
class ChatPageState with _$ChatPageState {
  factory ChatPageState({
    @Default([]) List<Message> messages,
    String? question,
    @Default(true) loading,
    String? errorMessage,
  }) = _ChatPageState;
}

class Message {
  final String text;
  final bool isUserText;

  Message({
    required this.text,
    this.isUserText = true,
  });
}
The Message class has two properties:
text: a required string representing the message's content.isUserText: a boolean value indicating whether the message was sent by the user or received from the AI. The default value for this property is true, meaning that if it is not specified when creating a newMessageobject, it will be assumed that the message was sent by the user.
The ChatPageState class uses the freezed package to generate immutable classes. It has four properties:
messages: a list ofMessageobjects representing the chat history. The default value for this property is an empty list.question: a string representing the current question or prompt sent by the user.loading: a boolean value indicating the timing of API request.errorMessage: a string representing any error message that may have occurred while loading the chat page.
The ChatPageState class has a named constructor called factory that takes in named parameters for each of its properties. It then passes these values to the private _ChatPageState constructor, which is generated by the freezed package. This constructor creates an immutable instance of the ChatPageState class.
View Model
This is a StateNotifier class named ChatPageViewModel that manages the state of a chat page. Here's what each part of the code does:
class ChatPageViewModel extends StateNotifier<ChatPageState> {
  ChatPageViewModel({required this.chatRepository}) : super(ChatPageState());

  final ChatRepository chatRepository;
}
This is the class definition for the ChatPageViewModel. It extends StateNotifier and manages a state of type ChatPageState. It also takes a chatRepository as a required parameter, which is an instance of a repository that communicates with the API.
Future<void> askQuestion({required String question}) async {
final userQuestion = Message(text: question, isUserText: true);
state = state.copyWith(
loading: true, messages: List.from(state.messages)..add(userQuestion));
final response = await chatRepository.makeRequest(question: question);
response!.when(success: (response) {
  final responseMsg = Message(text: response, isUserText: false);
  List<Message> messages = List.from(state.messages)..add(responseMsg);

  state = state.copyWith(messages: messages);
}, error: (errorMessage) {
  state = state.copyWith(errorMessage: errorMessage);
});
state = state.copyWith(loading: false);
}
This method is called when the user sends a question. It creates a Message object representing the user's question, sets the loading state to true during the time of API request, and adds the user's question to the state's messages list.
A request is sent to the API with the user's question and waits for a response. If the response is successful, it creates a Message object representing the response and adds it to the state's messages list. If there's an error, it sets the state's error message. Finally, it sets the loading state to false.
Overall, this ChatPageViewModel manages the state of a chat page and communicates with an API to provide responses to user questions.
Chat Page UI
Lets make the Chat page UI.
The UI will consist of a basic chat page with two main widget components:
- Chat bubble
- Message text box to compose the text message
Chat bubble
class ChatBubble extends StatelessWidget {
  final String message;
  final bool isSentByMe;

  const ChatBubble({
    required this.message,
    required this.isSentByMe,
    super.key,
  });

  @override
  Widget build(BuildContext context) {
    return Container(
      alignment: isSentByMe ? Alignment.centerRight : Alignment.centerLeft,
      child: Container(
        padding: const EdgeInsets.all(10),
        margin: const EdgeInsets.symmetric(vertical: 5),
        decoration: BoxDecoration(
          color: isSentByMe ? Colors.blue : Colors.grey[300],
          borderRadius: BorderRadius.only(
            topLeft: Radius.circular(20),
            topRight: Radius.circular(20),
            bottomLeft: isSentByMe ? Radius.circular(20) : Radius.circular(0),
            bottomRight: isSentByMe ? Radius.circular(0) : Radius.circular(20),
          ),
        ),
        child: Text(
          message,
          style: TextStyle(
            color: isSentByMe ? Colors.white : Colors.black,
          ),
        ),
      ),
    );
  }
}
In this widget, the message argument is the text message to display, the isMe argument is a boolean value that indicates whether the message is sent by the current user or the other user in the chat, and the key argument is an optional key for this widget.
The message bubble is displayed as a row with a Container widget that has a colored background and rounded borders on the appropriate corners based on the isMe value. The message text is displayed inside the Container widget with a Text widget. The width, padding, and margin properties of the Container widget are set to provide the appropriate spacing and layout for the message bubble.
Message text box
import 'package:flutter/material.dart';

class MesageInputBox extends StatefulWidget {
  final Function(String) onSend;

  const MesageInputBox({Key? key, required this.onSend}) : super(key: key);

  @override
  State<MesageInputBox> createState() => _MesageInputBoxState();
}

class _MesageInputBoxState extends State<MesageInputBox> {
  final TextEditingController _textController = TextEditingController();

  bool _isComposing = false;

  @override
  Widget build(BuildContext context) {
    return Container(
      padding: const EdgeInsets.symmetric(horizontal: 8.0),
      child: Row(
        children: [
          Expanded(
            child: TextField(
              controller: _textController,
              decoration: const InputDecoration.collapsed(
                hintText: 'Type a message',
              ),
              onChanged: (String text) {
                setState(() {
                  _isComposing = text.isNotEmpty;
                });
              },
              onSubmitted: _handleSubmit,
            ),
          ),
          IconButton(
            icon: const Icon(Icons.send),
            onPressed:
            _isComposing ? () => _handleSubmit(_textController.text) : null,
          ),
        ],
      ),
    );
  }

  void _handleSubmit(String text) {
    if (text.trim().isEmpty) return;

    widget.onSend(text);
    _textController.clear();

    setState(() {
      _isComposing = false;
    });
  }
}
In this widget, the sendMessage argument is a function that takes a string as input and sends a message to the chat. The _textController is used to control the state of the text input field.
The message composer is displayed as a Container widget with a padding of 8 on all sides. Inside the Container, there is a Row widget that contains an Expanded widget, which is used to take up all the available space for the text input field. The TextField widget is used for the text input field and has a controller that is set to _textController. The TextField also has a label and border decoration. The textCapitalization property is set to TextCapitalization.sentences to capitalize the first letter of each sentence automatically. The onSubmitted property is set to _sendMessage, which is called when the user presses the enter key or submits the text input.
Next to the text input field, there is an IconButton widget that displays a send icon. When the user taps on this button, the _sendMessage function is called, which sends the text input to the chat and clears the text input field.
Chat Page
// chat_page.dart

import 'package:cgp/repository/chat_repository.dart';
import 'package:cgp/ui/chat_page_view_model.dart';
import 'package:cgp/widgets/message_bubble.dart';
import 'package:flutter/material.dart';
import 'package:flutter_riverpod/flutter_riverpod.dart';
import 'package:get_it/get_it.dart';
import '../widgets/message_composer.dart';

import 'chat_page_state.dart';

GetIt injector = GetIt.instance;
final chatProvider =
StateNotifierProvider.autoDispose<ChatPageViewModel, ChatPageState>(
        (ref) => ChatPageViewModel(
      chatRepository: injector.get<ChatRepository>(),
    ));

class ChatPage extends ConsumerStatefulWidget {
  const ChatPage({Key? key}) : super(key: key);

  @override
  ConsumerState<ChatPage> createState() => _ChatPageState();
}

class _ChatPageState extends ConsumerState<ChatPage> {
  @override
  Widget build(BuildContext context) {
    final state = ref.watch(chatProvider);
    final viewModel = ref.read(chatProvider.notifier);

    return Scaffold(
      appBar: AppBar(
        title: const Text('ChatGPT Flutter App'),
      ),
      body: Padding(
        padding: const EdgeInsets.all(16),
        child: Column(
          children: [
            Container(),
            Expanded(
              child: ListView(
                children: [
                  ...state.messages.map(
                        (msg) => ChatBubble(
                      message: msg.text,
                      isSentByMe: msg.isUserText,
                    ),
                  ),
                ],
              ),
            ),
            MessageInputBox(
              onSend: (question) async {
                await viewModel.askQuestion(question: question);
              },
            ),
          ],
        ),
      ),
    );
  }
}
This is a StatefulWidget class named ChatPage that builds a chat interface for the user.
This code block returns a Scaffold widget that contains the chat interface. The AppBar displays the title of the app. The body contains a Column widget with two children:
- An
Expandedwidget containing aListViewwith children generated from the messages in theChatPageState. Each message is displayed using aChatBubblewidget, which takes the message text and whether the message was sent by the user as arguments. - A
MessageInputwidget with anonSendcallback function that calls theaskQuestionmethod of theChatPageViewModel.
Overall, this ChatPage class creates a chat interface that displays messages and sends user questions to the ChatPageViewModel for processing.
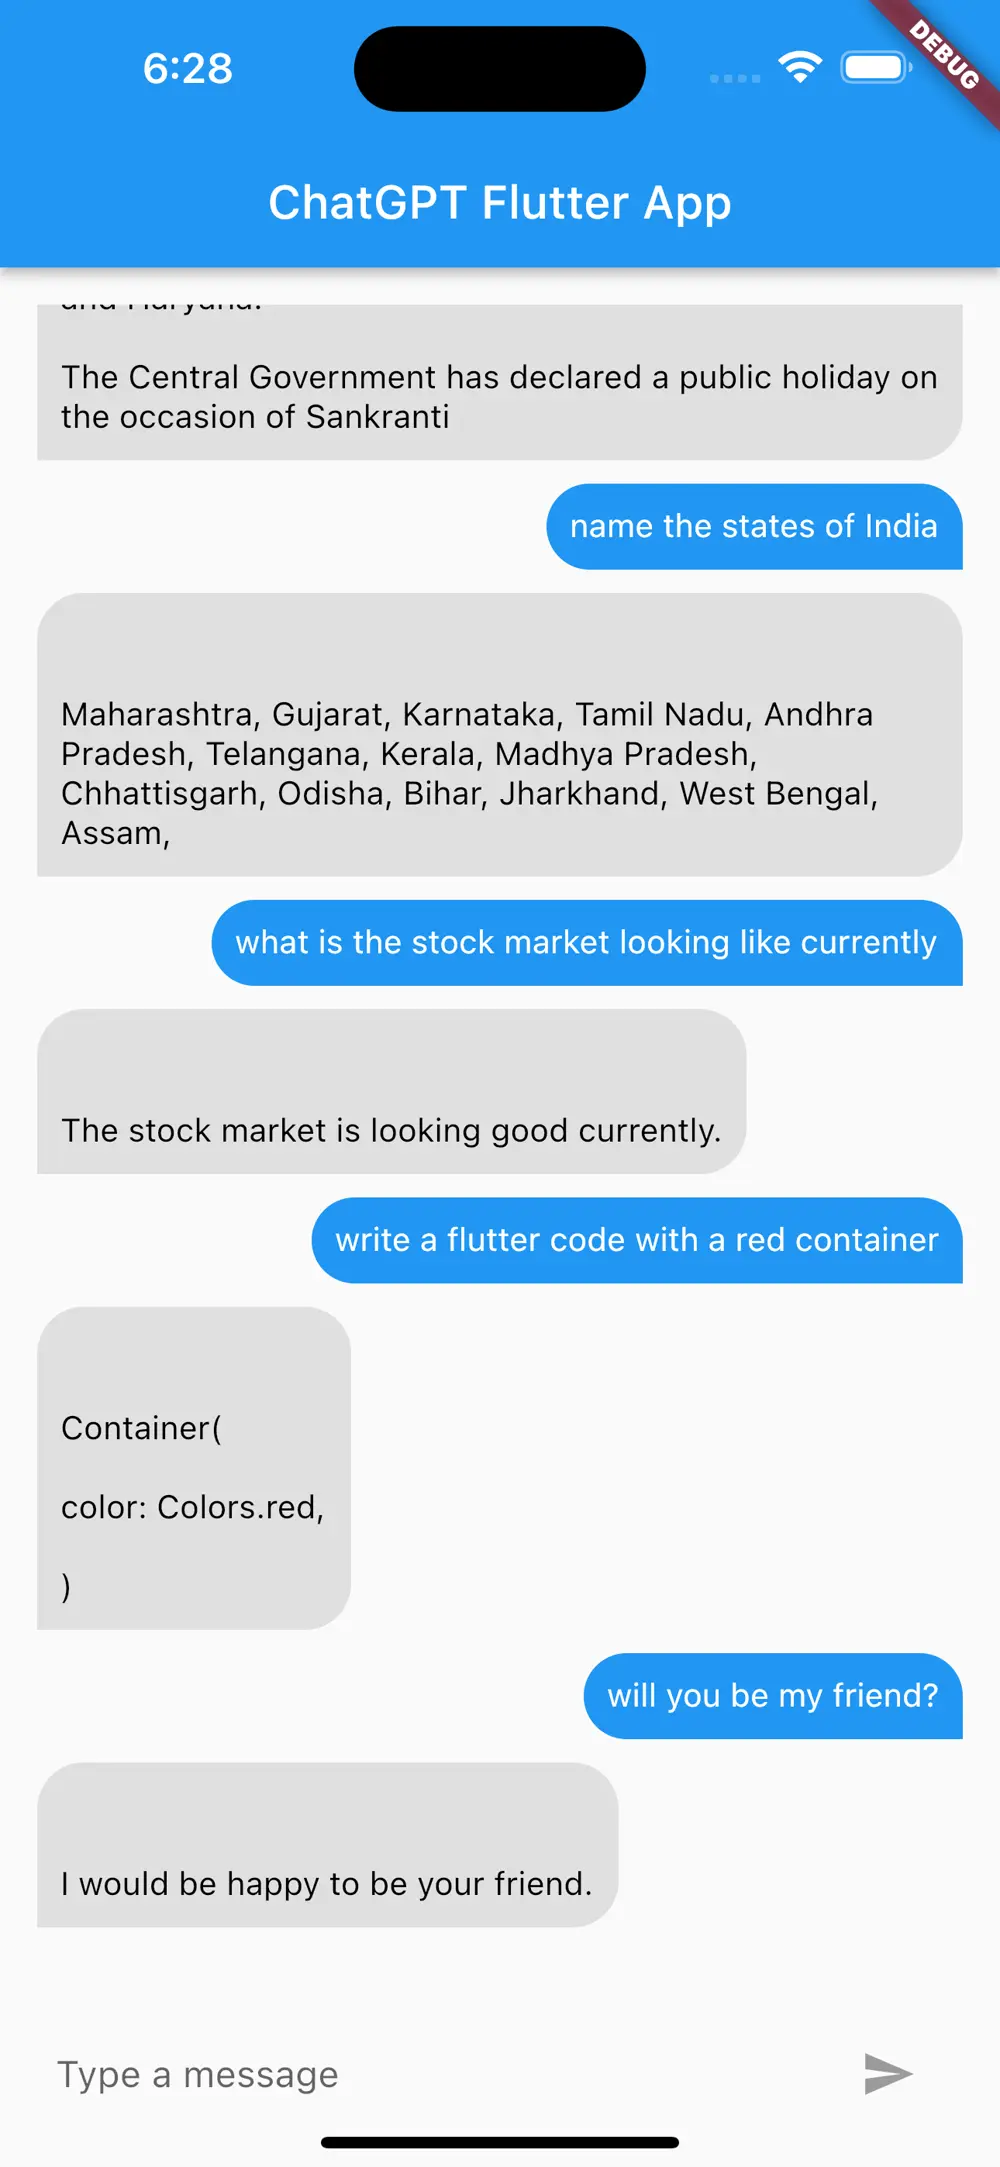
Run the app, it would finally look like the below:
The entire code can be found in the below repository: GithubRepo
Article Photo by D koi
Author

You may also like
Serverpod for a Weekend - The Good, The Bad, and The Surprising
I've been building Flutter apps professionally for years now, and I've seen the backend landscape evolve from Firebase to Supabase to custom Node.js APIs. Each solution came with trade-offs: Firebase locked you in, Supabase was great until you needed cust...

What I Thought Was People Management Wasn't People Management at All
This article is the 15th entry in the D-Plus🐬 Development Productivity Community Advent Calendar 2025. Day 14's article is... wait, nobody's there??? I had the opportunity to speak at D-Plus in Osaka back in May with a presentation called Task Management...
