Flutter is a powerful framework when it comes to rendering complex nested widgets with countless styles and customizations. This small project will explain the basics of using Google APIs and Services, in particular Google Drive, Google Docs and rendering a Google Document using Flutter widgets. The app supports basic text styling and displaying of images included in the document. Let's dive in and see how Flutter makes it easy to dynamically structure a complex page without any performance issues.
About the structure
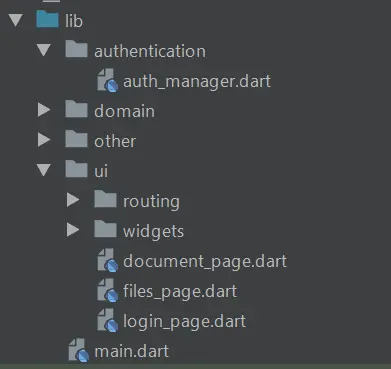
The project is composed of three pages: LoginPage (handles the user authentication), FilesPage (displays all the Google Docs documents), DocumentPage (displays the content of the document) and AuthManager which handles the authentication that I can reuse in all pages to keep them clean. There are also two custom widgets to display Ripple effect and Circular Progress but I will not cover them because they are used only for convenience.
Let's start with the Login page. I'm using the google_sign_in package to handle the user authentication.
Actual code
The AuthManager code is self-explanatory and only makes sure all the errors are handled and defines the GoogleSignIn scopes so I'm granted the required permissions to the user account.
emailaccess to user info like emaildocuments.readonlyaccess to read the documentsdrive.readonlyaccess to fetch the list of documents
import 'package:google_sign_in/google_sign_in.dart';

GoogleSignIn _googleSignIn = GoogleSignIn(
  scopes: <String>[
    'email',
    'https://www.googleapis.com/auth/documents.readonly',
    'https://www.googleapis.com/auth/drive.readonly'
  ],
);

class AuthManager {
  static Future<GoogleSignInAccount> signIn() async {
    try {
      final account = await _googleSignIn.signIn();
      print('account: ${account?.toString()}');
      return account;
    } catch (error) {
      print(error);
      return null;
    }
  }

  static Future<GoogleSignInAccount> signInSilently() async {
    var account = await _googleSignIn.signInSilently();
    print('account: $account');
    return account;
  }

  static Future<void> signOut() async {
    try {
      _googleSignIn.disconnect();
    } catch (error) {
      print(error);
    }
  }
}
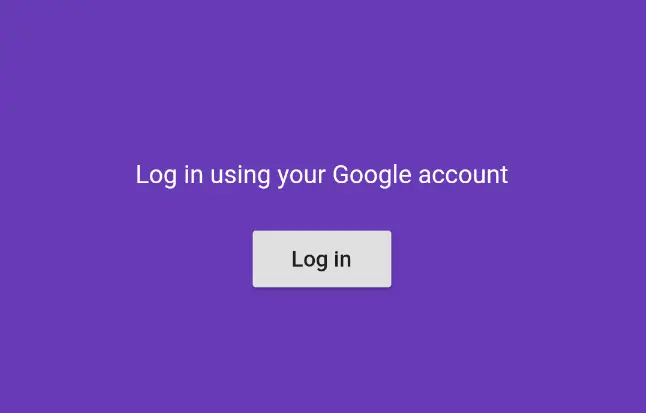
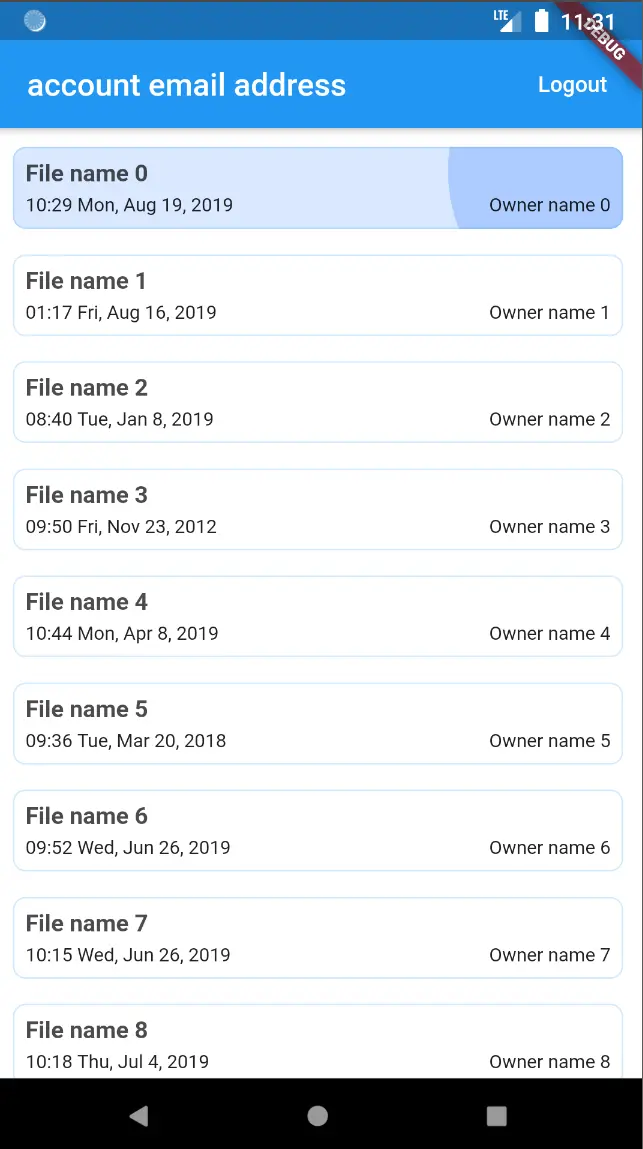
And this is how our Login page looks like.
@override
Widget build(BuildContext context) {
  return Scaffold(
    body: Container(
      color: Colors.deepPurple,
      child: Center(
        child: Column(
          mainAxisAlignment: MainAxisAlignment.center,
          children: <Widget>[
            Spacer(),
            Text(
              'Log in using your Google account',
              style: TextStyle(fontSize: 16, color: Colors.white),
            ),
            SizedBox(height: 20.0),
            RaisedButton(
              child: Text('Log in'),
              onPressed: _handleSignIn,
            ),
            Spacer(),
          ],
        ),
      ),
    ),
  );
}
When the user enters the Login page I check silently if the user was already signed-in in the past (the Authentication token is cached by the google_sign_in package). If the user is already signed-in AuthManager.signInSilently() returns the user account and I redirect to the Files page.
Future<void> signInSilently() async {
  var account = await AuthManager.signInSilently();
  if (account != null) {
    Navigator.pushReplacementNamed(context, AppRoute.files);
  }
}
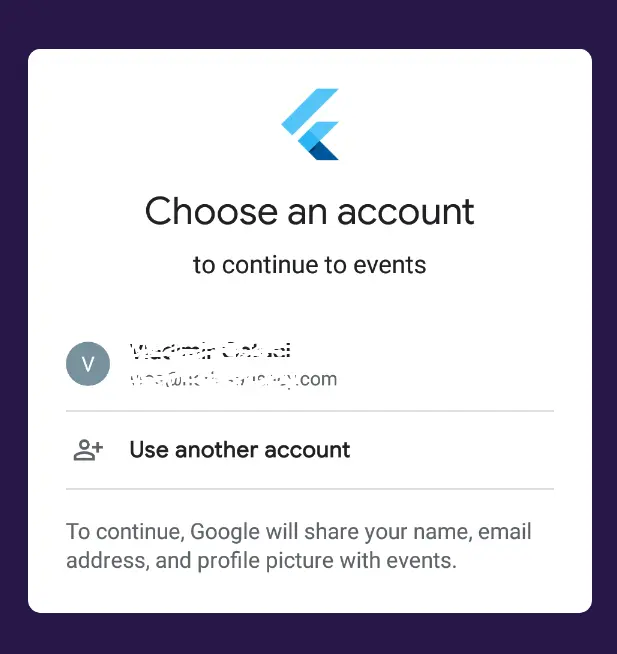
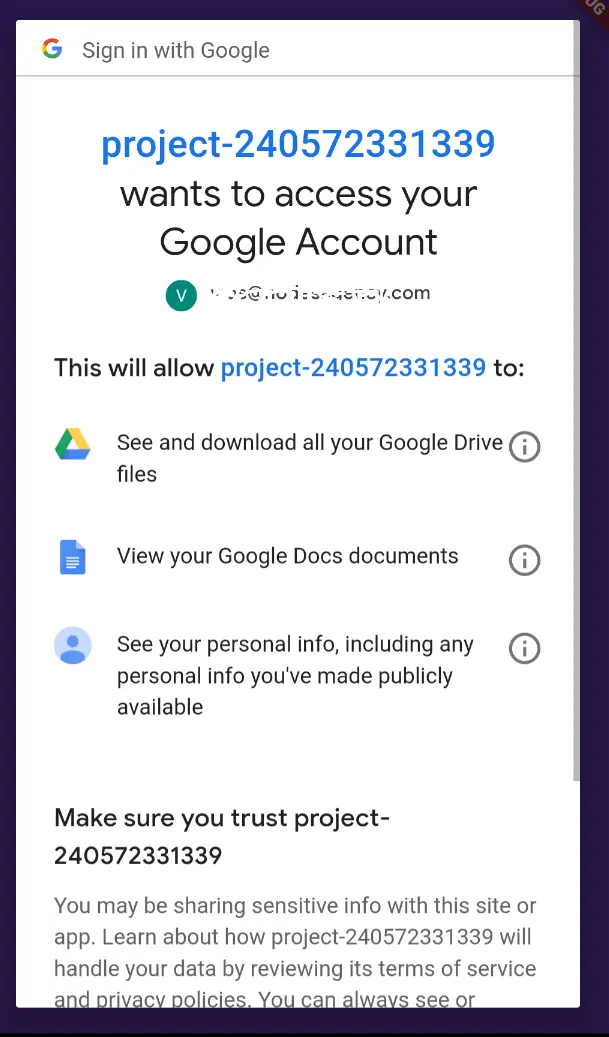
In case this is first app launch the user has to tap the Login button and the google_sign_in package will show the Account chooser and the Permissions dialogs as showed below.
In case the sign-in is successful, the Navigator is used to redirect the user to the Files page:
Future<void> _handleSignIn() async {
  var account = await AuthManager.signIn();
  if (account != null) {
    Navigator.pushReplacementNamed(context, AppRoute.files);
  }
}
AppRoute holds the route names. The routing is organized as follows:
Route onGenerateRoute(RouteSettings settings) {
  switch (settings.name) {
    case AppRoute.login:
      return MaterialPageRoute(
        builder: (context) => LoginPage(),
      );
    case AppRoute.files:
      return MaterialPageRoute(
        builder: (context) => FilesPage(),
      );
    case AppRoute.document:
      final args = settings.arguments as Map;
      return MaterialPageRoute(
        builder: (context) => DocumentPage(fileId: args[Args.fileId]),
      );
    default:
      return null;
  }
}

class Args {
  static const fileId = 'fileId';
}

class AppRoute {
  static const login = '/login';
  static const files = '/files';
  static const document = '/document';
}
Let's switch to the Files page. Despite the fact the code looks longer there's only a small important part where I fetch the file list using Google Drive Api. The rest is related to showing the file list UI.
  Future<void> _loadFiles() async {
    if (_currentUser == null) return;

    GoogleSignInAuthentication authentication =
        await _currentUser.authentication;
    print('authentication: $authentication');
    final client = MyClient(defaultHeaders: {
      'Authorization': 'Bearer ${authentication.accessToken}'
    });
    DriveApi driveApi = DriveApi(client);
    var files = await driveApi.files
        .list(q: 'mimeType=\'application/vnd.google-apps.document\'');
    setState(() {
      _items = files.items;
      _loaded = true;
    });
  }
I use the access token retrieved from GoogleSignInAuthentication object to access all the Google APIs. One thing to note here is that a custom HTTP client is used so the Authorization header is added to all the requests made by the Drive and Docs API clients. An alternative solution can be to use the googleapis_auth package which provides a few other ways to authenticate the user but I thought they required more code to implement.
To display the file list I use a simple ListView widget.
  Widget get _listView {
    return Container(
      color: Colors.white.withOpacity(0.8),
      child: ListView.separated(
        itemBuilder: (context, index) {
          var item = _items[index];
          final formatter = DateFormat('hh:mm EEE, MMM d, yyyy');

          return Card(
            elevation: 0.0,
            shape: RoundedRectangleBorder(
              side: BorderSide(width: 1.0, color: Colors.blue.withOpacity(0.2)),
              borderRadius: BorderRadius.circular(8.0),
            ),
            color: Colors.white.withOpacity(0.8),
            child: RippleWidget(
              radius: 8.0,
              onTap: () {
                var args = {Args.fileId: item.id};
                Navigator.pushNamed(context, AppRoute.document,
                    arguments: args);
              },
              child: Padding(
                padding: const EdgeInsets.all(8.0),
                child: Column(
                  crossAxisAlignment: CrossAxisAlignment.start,
                  children: <Widget>[
                    Text(
                      item.title,
                      style: TextStyle(
                        fontSize: 15.0,
                        fontWeight: FontWeight.bold,
                        color: Colors.black.withOpacity(0.7),
                      ),
                    ),
                    SizedBox(height: 4.0),
                    Row(
                      children: <Widget>[
                        Expanded(
                          child: Text(
                            formatter.format(item.createdDate),
                            style: TextStyle(
                              fontSize: 12.0,
                            ),
                          ),
                        ),
                        SizedBox(width: 8.0),
                        Text(
                          KtList.from(item.ownerNames).joinToString(),
                          style: TextStyle(
                            fontSize: 12.0,
                          ),
                        ),
                      ],
                    ),
                  ],
                ),
              ),
            ),
          );
        },
        separatorBuilder: (context, index) {
          return SizedBox(height: 8.0);
        },
        itemCount: _items.length,
        padding: const EdgeInsets.all(8.0),
      ),
    );
  }
There's also a logout button to log-out the user and open the Login page.
  _logout() {
    setState(() {
      _currentUser = null;
    });
    AuthManager.signOut();
    Navigator.pushReplacementNamed(context, AppRoute.login);
  }
When we tap on a list item the fileId is passed to the Document page so we can fetch our document using Docs API.
In the Document page first thing called when the user enters the screen is _loadDocument() which fetches the document and extracts the data we intend to display. Currently only a small subset of all the document features is supported.
  Future<void> _loadDocument() async {
    if (_currentUser == null) return;

    GoogleSignInAuthentication authentication =
        await _currentUser.authentication;
    print('authentication: $authentication');
    final client = MyClient(defaultHeaders: {
      'Authorization': 'Bearer ${authentication.accessToken}'
    });

    final docsApi = docsV1.DocsApi(client);
    var document = await docsApi.documents.get(widget.fileId);
    print('document.title: ${document.title}');
    print('content.length: ${document.body.content.length}');
    _parseDocument(document);
  }
The kt_dart package is used to simplify parsing of the interested fields. kt_dart wraps Dart List, Map, Set classes with custom classes prefixed with Kt which bring Kotlin operators used in Kotlin Standard library as they are much more complete compared to Dart standard classes.
  Future<void> _parseDocument(docsV1.Document document) async {
    _documentTitle = document.title;
    var content = KtList.from(document.body.content);

    final elements = content
        .mapNotNull(
          (element) => (element?.paragraph?.elements != null ||
                  element?.paragraph?.positionedObjectIds != null)
              ? element
              : null,
        )
        .asList();

    var inlineObjects = emptyMap<String, DocImageData>();
    if (document.inlineObjects?.isNotEmpty == true) {
      inlineObjects = KtMap.from(document.inlineObjects).map((inlineObject) {
        var embeddedObject =
            inlineObject.value.inlineObjectProperties.embeddedObject;
        return KtPair(
          inlineObject.key,
          DocImageData(
            url: embeddedObject.imageProperties.contentUri,
            width: embeddedObject.size.width.magnitude,
            height: embeddedObject.size.height.magnitude,
          ),
        );
      }).associate((pair) => pair);
    }

    var positionedObjects = emptyMap<String, DocImageData>();
    if (document.positionedObjects?.isNotEmpty == true) {
      positionedObjects =
          KtMap.from(document.positionedObjects).map((positionedObject) {
        var embeddedObject =
            positionedObject.value.positionedObjectProperties.embeddedObject;
        return KtPair(
          positionedObject.key,
          DocImageData(
            url: embeddedObject.imageProperties.contentUri,
            width: embeddedObject.size.width.magnitude,
            height: embeddedObject.size.height.magnitude,
          ),
        );
      }).associate((pair) => pair);
    }

    setState(() {
      _listItems = elements;
      _imagesData = inlineObjects.plus(positionedObjects).asMap();
      _contentLoaded = true;
    });
  }
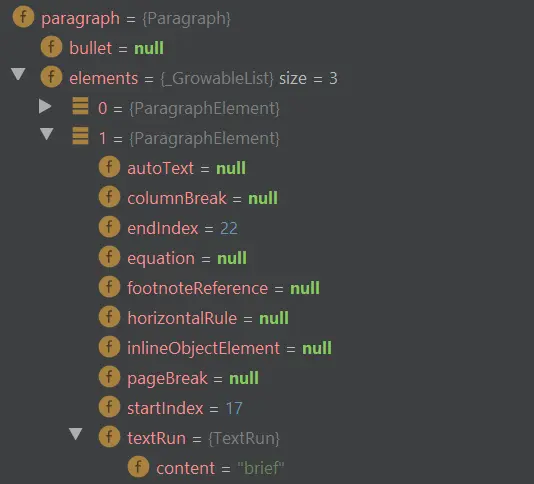
What we are interested in are the paragraph text, inline and positioned images. The text can be found in the ParagraphElement.textRun.content field as you can see from the image below.
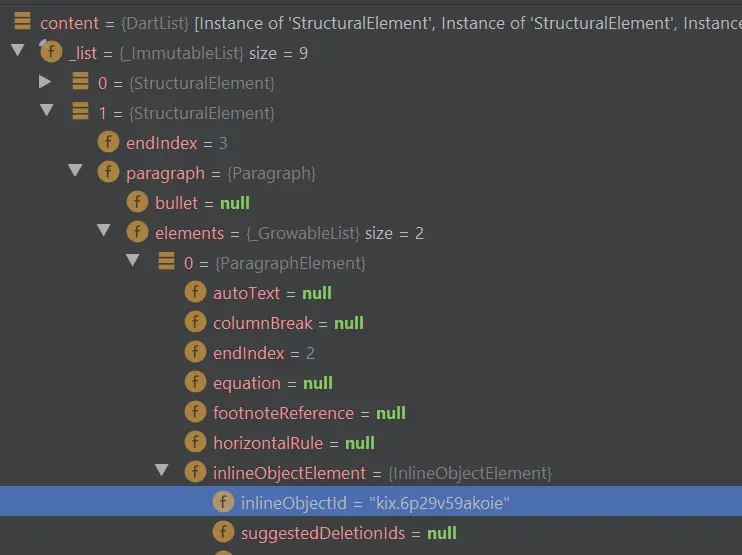
The inline image id is stored in the ParagraphElement.inlineObjectElement.inlineObjectId.
The positioned image ids are stored directly in the document in Document.positionedObjects. In our case we treat positioned images and inline images the same and show them inline just to make things easier.
The most important part in all this is probably mapping the Document elements to Flutter Widgets. All of this is happening in _elementToWidget() which takes an element we support and create a widget for it.
  Widget _elementToWidget(docsV1.StructuralElement element) {
    final alignment =
        _getAlignment(element.paragraph.paragraphStyle?.alignment);
    final paragraphSpans = KtList.from(element.paragraph.elements)
        .mapNotNull((element) => element?.textRun)
        .map(
      (textRun) {
        if (textRun.textStyle != null) {
          return TextSpan(
            text: textRun.content,
            style: _getTextStyle(
              element.paragraph.paragraphStyle?.namedStyleType,
              textRun.textStyle,
            ),
          );
        } else {
          return TextSpan(text: textRun.content);
        }
      },
    );
    var paragraphText = paragraphSpans.isNotEmpty()
        ? Container(
            width: double.infinity,
            child: RichText(
              textAlign: alignment,
              text: TextSpan(
                children: paragraphSpans.asList(),
                style: TextStyle(color: Colors.black),
              ),
            ),
          )
        : null;

    var paragraphInlineImages = [];
    if (element.paragraph.elements != null) {
      paragraphInlineImages = KtList.from(element.paragraph.elements)
          .mapNotNull((element) => element.inlineObjectElement?.inlineObjectId)
          .map((String objectId) => _imagesData[objectId])
          .map((DocImageData imgData) {
        return Image.network(
          imgData.url,
          width: imgData.width,
          height: imgData.height,
        );
      }).asList();
    }

    var paragraphPositionedImages = [];
    if (element.paragraph.positionedObjectIds != null) {
      paragraphPositionedImages =
          KtList.from(element.paragraph.positionedObjectIds)
              .map((String objectId) {
        return _imagesData[objectId];
      }).map((DocImageData imgData) {
        return Image.network(
          imgData.url,
          width: imgData.width,
          height: imgData.height,
        );
      }).asList();
    }

    final hasImages = (paragraphInlineImages.isNotEmpty == true) ||
        (paragraphPositionedImages.isNotEmpty == true);

    return hasImages
        ? Column(
            crossAxisAlignment: CrossAxisAlignment.start,
            children: <Widget>[
              ...paragraphInlineImages,
              ...paragraphPositionedImages,
              if (paragraphText != null) paragraphText,
            ],
          )
        : (paragraphText != null) ? paragraphText : Container();
  }
Text paragraphs are mapped to RichText widgets so they can support text styles (bold, italic), colors, alignment, size, background color. The images are displayed without any modifications by only applying the provided size.
[https://console.developers.google.com]. The services will usually take around 5-10 minutes to be enabled.
.
The source code for this project is available on GitHub.
Author

You may also like
Serverpod for a Weekend - The Good, The Bad, and The Surprising
I've been building Flutter apps professionally for years now, and I've seen the backend landscape evolve from Firebase to Supabase to custom Node.js APIs. Each solution came with trade-offs: Firebase locked you in, Supabase was great until you needed cust...

What I Thought Was People Management Wasn't People Management at All
This article is the 15th entry in the D-Plus🐬 Development Productivity Community Advent Calendar 2025. Day 14's article is... wait, nobody's there??? I had the opportunity to speak at D-Plus in Osaka back in May with a presentation called Task Management...
